🏅오늘의 목표
- 회원가입 전, 이메일 인증 구현
✅ 진행한 작업
- 이메일 인증 구현
📃 개발내용
이메일 인증 시 기대효과
- 사용자 신원 확인
- 사용자가 제공한 이메일 주소가 실제로 존재하며, 사용자가 그 주소에 접근할 수 있음을 확인
- 실제 계정과 가짜 계정을 구분
- 보안 강화
- 이메일 인증 과정을 통해 비밀번호 재설정, 계정 변경 사항 알림 등 알릴 수 있음
SMTP
- 간이 우편 전송 프로토콜(Simple Mail Transfer Protocol)의 약자
- 이메일 전송에 사용되는 네트워크 프로토콜
Redis vs DB
| 기능 | Redis | DB |
|---|---|---|
| 자동 만료 | ✅ TTL 지원 | ❌ 크론잡 필요 |
| 조회 속도 | ✅ 매우 빠름 (메모리) | △ 상대적으로 느림 |
| 임시 데이터 | ✅ 적합 | △ 부적합 |
| 영구 저장 | ❌ 휘발성 | ✅ 영구 저장 |
| 사용 목적 | 인증 토큰 (10분) | 인증 완료 여부 (영구) |
| - TTL(Time To Live) : 데이터가 살아 있는 최대 시간 = 유효시간 | ||
| - 인증 데이터 특성에 적합한 저장소 | ||
| - 이메일 인증 코드 같은 데이터는 | ||
| - 짧은 유효시간을 가짐 | ||
| - 일정 시간이 지나면 자동으로 폐기 | ||
| - 조회, 검증이 매우 빈번하게 발생 | ||
| - Redis 는 키 단위 TTL 을 기본 제공하여, 별도의 작업 없이도 자동 만료 처리가 가능 | ||
| - DB 에 휘발성 데이터를 저장하지 않기 위해 | ||
| - 휘발성 데이터는 Redis, 영속 데이터는 DB | ||
| - 빠른 응답성 | ||
| - Redis 는 메모리 기반 저장소이기 때문에 지연 없는 빠른 응답 제공 |
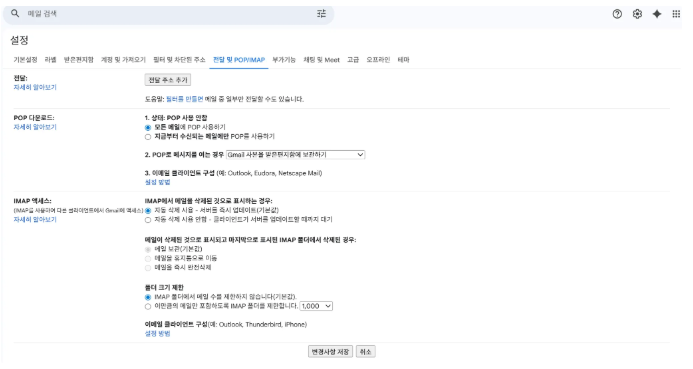
구글 설정
- 구글 로그인 → 구글 계정 관리 → 앱 비밀번호
- 비밀번호 생성
- 구글 Gmail → 설정 → 전달 및 POP/IMAP → 아래 이미지처럼 설정 → 변경사항 저장


🔄 전체 동작 흐름
인증 메일 발송
사용자 요청
    ↓
이미 인증된 이메일? → YES → ❌ 에러
    ↓ NO
1분 내 발송 이력? → YES → ❌ 에러
    ↓ NO
토큰 생성 → Redis 저장 (10분)
    ↓
메일 발송 시도
    ↓
성공? → NO → Redis 삭제 → ❌ 에러
    ↓ YES
재발송 방지 토큰 저장 (1분)
    ↓
✅ 완료
인증 처리
링크 클릭
    ↓
Redis에서 토큰 조회 + 삭제
    ↓
토큰 있음? → NO → ❌ false
    ↓ YES
DB에서 인증 상태 조회
    ↓
이미 인증됨? → YES → ✅ true
    ↓ NO
인증 완료 처리 → DB 저장
    ↓
✅ true
구현
build.gradle
//email
implementation 'org.springframework.boot:spring-boot-starter-mail'

//redis
implementation 'org.springframework.boot:spring-boot-starter-data-redis'
application.yml
  mail:
    host: smtp.gmail.com # Gmail 의 SMTP 서버 호스트
    port: 587
    username: sondonghyuk0304@gmail.com
    password : ${MAIL_PASSWORD}
    properties:
      mail:
        smtp:
          auth: true # SMTP 서버에 인증해야 하는 경우 true 지정(gmail 필수)
          starttls: # TLS : 데이터를 암호화해 안전한 전송을 보장하는 프로토콜
            enable: true # STARTTLS 사용
            required: true # STARTTLS 협상이 안 되면 아예 실패 처리
          connectiontimeout: 5000 # SMTP 서버 연결 시도 제한(ms)
          timeout: 5000 # SMTP 서버 응답 대기(ms)
          writetimeout: 5000 # SMTP 요청 전송 대기(ms)

  data:
    redis:
      host: localhost
port: 6379- 실제 Gmail 계정 정보로 변경해야 함
EmailConfig
@Configuration
public class EmailConfig {
    @Value("${spring.mail.host}")
    private String host;

    @Value("${spring.mail.port}")
    private int port;

    @Value("${spring.mail.username}")
    private String username;

    @Value("${spring.mail.password}")
    private String password;

    @Value("${spring.mail.properties.mail.smtp.auth}")
    private boolean auth;

    @Value("${spring.mail.properties.mail.smtp.starttls.enable}")
    private boolean starttlsEnable;

    @Value("${spring.mail.properties.mail.smtp.starttls.required}")
    private boolean starttlsRequired;

    @Value("${spring.mail.properties.mail.smtp.connectiontimeout}")
    private int connectionTimeout;

    @Value("${spring.mail.properties.mail.smtp.timeout}")
    private int timeout;

    @Value("${spring.mail.properties.mail.smtp.writetimeout}")
    private int writeTimeout;

    @Bean
    public JavaMailSender javaMailSender(){
        JavaMailSenderImpl mailSender = new JavaMailSenderImpl();
        mailSender.setHost(host);
        mailSender.setPort(port);
        mailSender.setUsername(username);
        mailSender.setPassword(password);
        mailSender.setDefaultEncoding("UTF-8");
        mailSender.setJavaMailProperties(getMailProperties());
        return mailSender;
    }

    private Properties getMailProperties(){
        Properties properties = new Properties();
        properties.put("mail.smtp.auth", auth);
        properties.put("mail.smtp.starttls.enable", starttlsEnable);
        properties.put("mail.smtp.starttls.required", starttlsRequired);
        properties.put("mail.smtp.connectiontimeout", connectionTimeout);
        properties.put("mail.smtp.timeout", timeout);
        properties.put("mail.smtp.writetimeout", writeTimeout);
        return properties;
    }
}- 클래스
- 메일 전송에 필요한 Bean 들을 직접 등록하는 설정 클래스
- JavaMailSender 를 직접 생성하고, SMTP 서버 연결에 필요한 옵션을 구성
- JavaMailSender Bean
- Spring 에서 메일을 보낼 때 사용하는 표준 인터페이스
- SMTP 서버 정보 , 인증 정보, 한글 깨짐 방지, 세부 옵션 설정
- getMailProperties
- mail.smtp.* 형태의 JavaMail 세부 설정을 별도의 메서드로 분리
- 설정을 한 곳에 모으고 유지보수성 높임
Spring Boot 에서는 spring.mail.* 설정만 있으면 JavaMailSender 가 자동으로 빈 등록된다.
그럼에도 EmailConfig 클래스를 사용하는 이유는 아래와 같다.
- 메일 설정을 자동 설정에 맡기지 않고, 코드로 명시해 구성 요소와 옵션을 관리
- 서비스 상황에 맞게 커스터마이징, 확장이 용이하도록 하기 위함
EmailVerificationRepository
public interface EmailVerificationRepository extends JpaRepository<EmailVerification, Long> {
    Optional<EmailVerification> findByEmail(String email);
    boolean existsByEmailAndVerifiedIsTrue(String email);
}
EmailVerificationService
@Slf4j
@Service
@RequiredArgsConstructor
public class EmailVerificationService {
    private final RedisTemplate<String, String> redisTemplate;
    private final JavaMailSender mailSender;
    private final EmailVerificationRepository emailVerificationRepository;

    // 이메일 인증시 호출
    public void sendVerificationEmail(String email) {
        log.info("이메일 인증 요청: email={}", email);

        // 이미 인증된 이메일인지 체크
        emailVerificationRepository.findByEmail(email)
            .filter(EmailVerification::isVerified)
            .ifPresent(emailVerification -> {
                throw new BaseException(UserErrorCode.EMAIL_ALREADY_VERIFIED);
            });

        // 호출 제한 토큰 생성
        String limitKey = "email:limit:"+email;

        // 호출 제한 체크
        if(Boolean.TRUE.equals(redisTemplate.hasKey(limitKey))) {
            throw new BaseException(UserErrorCode.EMAIL_SEND_TOO_FREQUENT);
        }

        // 인증 토큰 생성
        String token = UUID.randomUUID().toString();
        String redisKey = "email:verify:"+token;

        // Redis 저장
        redisTemplate.opsForValue().set(redisKey,email,10, TimeUnit.MINUTES);

        // 인증 링크 생성
        String link = "http://localhost:8080/email/verify?token="+token;

        // 이메일 발송
        SimpleMailMessage message = new SimpleMailMessage();
        message.setTo(email);
        message.setSubject("[Run-ing] 이메일 인증");
        message.setText(
            "안녕하세요,\n\n" +
                "Run-ing 이메일 인증을 위해 아래 링크를 클릭해주세요.\n\n" +
                link + "\n\n" +
                "이 링크는 10분간 유효합니다.\n" +
                "본인이 요청하지 않았다면 이 메일을 무시해주세요."
        );

        try{
            mailSender.send(message);
            // 호출 제한 토큰 저장 -> 이 키가 존재하는 동안 재발송 불가 (1분)
            redisTemplate.opsForValue().set(limitKey,"1",1,TimeUnit.MINUTES);
            log.info("이메일 발송 성공: email={}", email);
        }catch (RuntimeException e) {
            redisTemplate.delete(redisKey); // 발송 실패시 토큰 제거
            log.error("메일 발송 실패 : email={}, error={}", email, e.getMessage());
            throw new BaseException(UserErrorCode.EMAIL_SEND_FAIL);
        }
    }

    // 사용자가 인증 링크를 클릭했을 때 호출
    @Transactional
    public boolean verifyEmail(String token) {
        log.info("이메일 인증 시도: token={}", token);
        // Redis 에서 토큰 조회
        String redisKey = "email:verify:"+token;
        String email = redisTemplate.opsForValue().getAndDelete(redisKey);

        if (email == null) {
            log.warn("유효하지 않은 토큰: token={}", token);
            return false;
        }

        // 이미 인증된 이메일인지 체크
        EmailVerification emailVerification = emailVerificationRepository
            .findByEmail(email)
            .orElseGet(() -> new EmailVerification(email));

        if (emailVerification.isVerified()) {
            log.info("이미 인증된 이메일: email={}", email);
            return true;
        }

        emailVerification.markVerified();
        emailVerificationRepository.save(emailVerification);

        log.info("이메일 인증 완료: email={}", email);

        return true;
    }
}
sendVerificationEmail - 사용자가 “인증 이메일 보내기” 버튼을 눌렀을 때 호출되는 메서드
- 이미 인증된 이메일인지 체크
- 불필요한 메일 발송을 방지하고 서버 리소스를 절약
- 중복 발송 방지
- 사용자가 인증 전송 버튼을 연속으로 클릭할 수 있음
- 메일 도배 방지 및 서버 부하 방지
- 동작 방식
- 첫 번째 요청 : limitKey 없음, 메일발송
- 두 번째 요청(30초 후) : limitKey 있음 , 에러
- 세 번째 요청(1분 10초 후) : limitKey 만료, 메일 발송
- Boolean.TRUE.equals()
- Redis 연결 실패 시 null 이 와도 false 로 처리
- 인증 토큰 생성 및 Redis 저장
- Redis 에 저장되는 데이터
- 키 : email:verify:a1b2c3d4-e5f6-7890-abcd-ef1234567890
- 값 : user@example.com
- 유효시간(TTL) : 10분
- Redis 에 저장되는 데이터
- 인증 링크 생성
- 메일 발송 및 에러 처리
- 발송 성공 시 → 1분간 재발송 불가능하도록 표시
- 발송 실패 시 → 인증 토큰 삭제
verifyEmail - 사용자가 인증 링크를 클릭했을 때 호출
- Redis 에서 토큰 조회 및 삭제
- getAndDelete
- 조회와 동시에 삭제 → 원자성 보장
- 토큰 재사용 방지
- email 이 null 인 경우
- 10지나서 자동 만료
- 이미 사용한 토큰
- 존재하지 않는 토큰
- getAndDelete
- DB 에서 인증 상태 확인 및 업데이트
- DB 에 기록이 없는 경우
- 이메일 인증 생성
- DB 에 기록이 있는 경우
- 기존 데이터 사용
- DB 에 기록이 없는 경우
EmailVerificationController
@RestController
@RequestMapping("/email")
@RequiredArgsConstructor
public class EmailVerificationController {
    private final EmailVerificationService emailVerificationService;

    @PostMapping("/verify-request")
    public ResponseEntity<ApiResponse<Void>> requestEmailVerification(
        @Valid @RequestBody EmailVerificationRequest request
    ){
        emailVerificationService.sendVerificationEmail(request.email());
        return ResponseEntity.ok(new ApiResponse<>("인증 메일이 발송되었습니다."));
    }

    @GetMapping("/verify-link")
    public ResponseEntity<ApiResponse<Void>> verifyLink(
        @RequestParam String token
    ){
        boolean result = emailVerificationService.verifyEmail(token);
        if(result){
            return ResponseEntity.ok(new ApiResponse<>("이메일 인증이 완료되었습니다."));
        }else{
            return ResponseEntity.status(HttpStatus.GONE).body(new ApiResponse<>("유효하지 않거나 만료된 링크입니다. 인증 메일을 다시 요청해주세요."));
        }
    }
}
SecurityConfig
@Bean
    public SecurityFilterChain securityFilterChain(HttpSecurity http, AuthenticationManager authenticationManager,
        CustomUserDetailsService customUserDetailsService) throws Exception {
        // cors
        http
            .cors(cors -> cors
                .configurationSource(corsConfigurationSource())
            );

        // csrf
        http.csrf(auth->auth.disable());

        // form 로그인 방식
        http
            .formLogin(auth->auth.disable());

        // http basic 인증 방식
        http
            .httpBasic(auth->auth.disable());

        // 경로별 인가 방식
        http
            .authorizeHttpRequests(auth -> auth
                .requestMatchers(HttpMethod.POST, "/users/signup").permitAll()
                .requestMatchers(HttpMethod.POST, "/login").permitAll()
                .requestMatchers("/email/**").permitAll()
                .anyRequest().authenticated()
            );

        // 필터 추가
        http
            .addFilterBefore(new JWTAuthenticationFilter(jwtUtil,customUserDetailsService),CustomUsernamePasswordAuthenticationFilter.class)
            .addFilterAt(new CustomUsernamePasswordAuthenticationFilter(authenticationManager,jwtUtil),
                UsernamePasswordAuthenticationFilter.class);

        // 세션 설정
        http
            .sessionManagement(session -> session
                .sessionCreationPolicy(SessionCreationPolicy.STATELESS)
            );

        return http.build();
}- 회원가입 전 /email/** 는 비로그인 접근이 가능해야 하므로 permitAll 로 허용
📝테스트
Redis 실행
- 터미널에서 아래 명령어로 Redis 실행
docker run --name 컨테이너 이름 -p 6379:6379 -d redis- -p 6379:6379 : 내 컴퓨터 6379 포트를 컨테이너의 Redis 포트에 연결
- -d redis : 백그라운드에서 redis 이미지 실행
- 정상 실행 확인
docker ps포스트맨

- Headers → Content-Type : application/json
- Body → raw → JSON

- token 값 입력해야 함
참고자료
https://ddururiiiiiii.tistory.com/613
https://hyunmin1906.tistory.com/276
'런닝 코스 공유 서비스' 카테고리의 다른 글
| [런닝 코스 공유 서비스] - 16. AccessToken 블랙리스트 (0) | 2026.01.11 |
|---|---|
| [런닝 코스 공유 서비스] - 15. Refresh Token (0) | 2026.01.11 |
| [런닝 코스 공유 서비스] - 13. 회원 정보 조회 및 수정 (0) | 2026.01.11 |
| [런닝 코스 공유 서비스] - 12. 회원 , 프로필 도메인 및 회원가입 API 구현 (0) | 2026.01.11 |
| [런닝 코스 공유 서비스] - 11. JWT 로그인 (1) | 2026.01.02 |